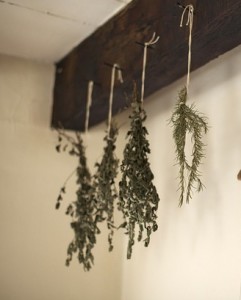
There is nothing that will make or break a dish like choosing the right quality and type of herbs and spices. And, as with all things, growing your own is always better, cheaper, and more rewarding. But, while fresh herbs are pretty fantastic, sometimes it can be hard to keep up with the growth rate. I mean, there's really only so much rosemary a person needs, right? So, if you are in that boat then don't worry! There are plenty of options for drying, preserving, and storing your ... [ Read More ]
Tips for Freezing Berries
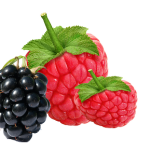
I have always been something of a fruit nut, but my absolute favorite has to be berries. It doesn't really matter what kind--cherries, blueberries, strawberries, blackberries, raspberries--they are so versatile I absolutely love all of them. We always have berries in the house in the summers, and I do my best to try and freeze some to get through the cool winters. So, no matter what berry you are freezing, here are some steps to getting the most out of the best fruits nature has ... [ Read More ]
How Long Does Canned Food Last?
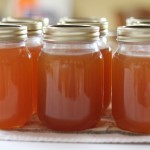
I think we've all done it at least once. You're going through your pantry and you find a can of pickles or perhaps some peaches stuffed way back in the back. You scratch your head in confusion. When was the last time you even canned peaches? And, more importantly, is it still safe to eat? There are a lot of different factors to consider when deciding if a home canned good is still safe to eat. Things to consider include age, the quality of the canned good, where it was stored, and most ... [ Read More ]
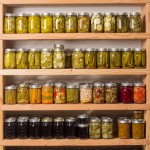
20 Reasons to Can Food at Home

I am pretty much convinced that when it comes to canning, there are really only two kinds of people in the world: People who love canning, and people who have never really tried it. I don't currently have the space or means to do much canning, but the benefits from putting up your own canned goods just go on and on. I think there is just something fantastic about knowing that you're not only being self-sufficient, prepared, frugal and also healthy. In fact, there are dozens of reasons why ... [ Read More ]
Disposing Spoiled Canned Goods Safely
While canning food is delicious and a great way to preserve excess food that you grow or purchase throughout the year, there are always some risks with home preparation. One of the biggest concerns of canners everywhere is botulism, a deadly bacteria that can grow on spoiled foods. While there are several methods for identifying spoiled canned goods, a lot of times, it is readily apparent that something is not right. Regardless of why it happened, the most important thing is to ensure that ... [ Read More ]
Identifying Spoiled Canned Food

Canning can be an incredibly rewarding process that is not only good for your budget but also pretty tasty. There's just nothing like opening a can of strawberry jam in the dead of winter and reliving some of that summer goodness yet again. But, canning is a very precise process and if done incorrectly, it can lead to all kinds of complications and illnesses including botulism. While it sounds pretty scary, there are a few things you can do to keep yourself and your family safe. Aside from ... [ Read More ]
Freezer Tips, Tricks and Expiration Guides
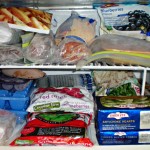
If you are a frugal shopper or grow/make a lot of your own food, then chances are you've probably got a whole lot of things in your freezer to be eaten later. At my house, whenever the grocery store has some meats or certain veggies that we eat a lot of on sale, I try and purchase some extra to throw in my freezer for later. But, contrary to popular belief, food actually doesn't stay good in the freezer forever. So, here are some tips, tricks and guides to consider the next time you're ... [ Read More ]
Get the Lowdown on Different Dehydrators and Choose the Best One For You
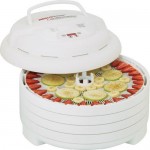
I love my dehydrator probably more than any other appliance I own other than my kitchen aide mixer. It is also my favorite preservation method. Don’t get me wrong, I don’t dry everything I grow or bring home, and I actually canned far more than I dried, but I love my dehydrator for the versatility it offers me. There are so many things I can do with the dehydrator, in terms of snacks and extras I would not otherwise be able to afford, that if I had to choose one appliance from my ... [ Read More ]
10 Beginner Canning Mistakes You Might Just Be Making
We have all had our share of canning disasters. Sometimes those canning disasters can threaten to destroy all of your hard work, other times they can discourage you from wanting to try canning ever again. The worst mistakes can make you sick. Canning is not difficult but there is some amount of exactness to it that can cause the smallest thing to upset the entire process. Beginners can easily be discouraged by what they believe are the dangers of canning, or because they cannot ... [ Read More ]