
 If you thought that yeast bread recipes were forever beyond you, then this post is for you. Like anything else you try in the kitchen making successful bread is a blend of the right knowledge and a little bit of practice. I learned to bake bread in a bakery of a restaurant, it was very intimidating but with the right tricks and someone to guide me, I picked it up right away. There are a number of bread secrets you should use as you bake bread that will give you consistent results time and time again. What’s more many of these secrets will ensure that your bread is the envy of your circle of friends and family and they will ask for your bread time and time again.
In truth making yeast bread is really easy, even for beginners. Learn a few simple rules and techniques and you will never again feel intimidated to try any type of bread or bread recipe. Bread is a matter of patience and a knowledgeable eye. There are no absolutes in the bread world, you must learn to think past numbers such as measurements and time, and get straight to the factors that will ensure you have great bread every time.
Pay Close Attention to Ingredients
Getting ingredients right is crucial with bread baking, I always choose instant yeast, and I keep most of it in the freezer except for a small portion that is kept in the fridge. Yeast is a living organism so it will stay live and viable longer if kept cool.
If you do not keep it in the freezer or fridge it is vital to keep a close eye on the expiration date. If it is old make sure to proof it with a bit of warm water and sugar from the recipe first before you use it. If it foams up it is still live and you can use it.
I never proof yeast unless I think it is old, simply because with instant yeast you do not need to. I have never had a problem with my yeast rising or my bread turning out fine. Of course yeast never stays in my house for long. On a side note, grab bricks of yeast from the wholesale clubs, they are much cheaper and last a lot longer.
Flour – while all-purpose flour works fine for bread making purposes, bread flour makes an even better bread. Why? Because a different type of wheat is used to make bread flour and it is higher in protein. That protein content helps the gluten to develop better, something that can be useful if you are new to bread making.
Pay Attention to the Environment
 Is it too cold? Make sure you leave your dough to rise in a warm place. If it is too cold in the house I turn my oven on at its lowest temperature and put the dough on the stovetop to rise.
Humidity and altitude can also affect how your bread comes out. Keep notes when you make bread as to the weather and how your bread turns out. Keep notes and you will soon know when and how to make the best bread.
One more tip – if it is very dry where you live, you can put a pan of hot/boiling water in the bottom of an oven, and put your dough in the oven to rise. You can also turn the oven light on for a bit of added heat if needed. Congratulations you have made a make shift proofer like they use in bakeries!
Liquids
Nothing can ruin a loaf of bread faster than liquid ingredients that are too hot, and cold ingredients will make your yeast sluggish which it may or may not be able to recover from. Make sure all of your dry ingredients are room temperature, and make sure that your liquid ingredients are in the 100 -110 degrees Fahrenheit range. Eggs and fat can be at room temperature, but water and milk must be warm.
If you do not have a thermometer for your water, you can test the warmth of the water on your wrist, when I worked in a bakery this is how I learned to do it. If the water is warm but has no bite as hot water does, then it is perfect. Baby bottle warm is how it was described to me.
Measuring
A lot of sites go into detail about how ingredients should be measured for making bread, I approach this subject a lot differently than most people do. While it is true that weighing ingredients can give much more accurate results, most recipes are written with cup measurements in mind.
You will also get a lot of advice about what type of measurements to use, how to measure the flour and more.
But here is the thing, the amount of flour you use in a recipe is highly dependent on factors exterior to how you are measuring. I can put the exact same amount of flour in my bread on a really dry day as I do on a humid day and I will get very different results.
So I advocate measuring carefully for all of the ingredients but to learn to add flour by eye rather than exact measurements in cups.
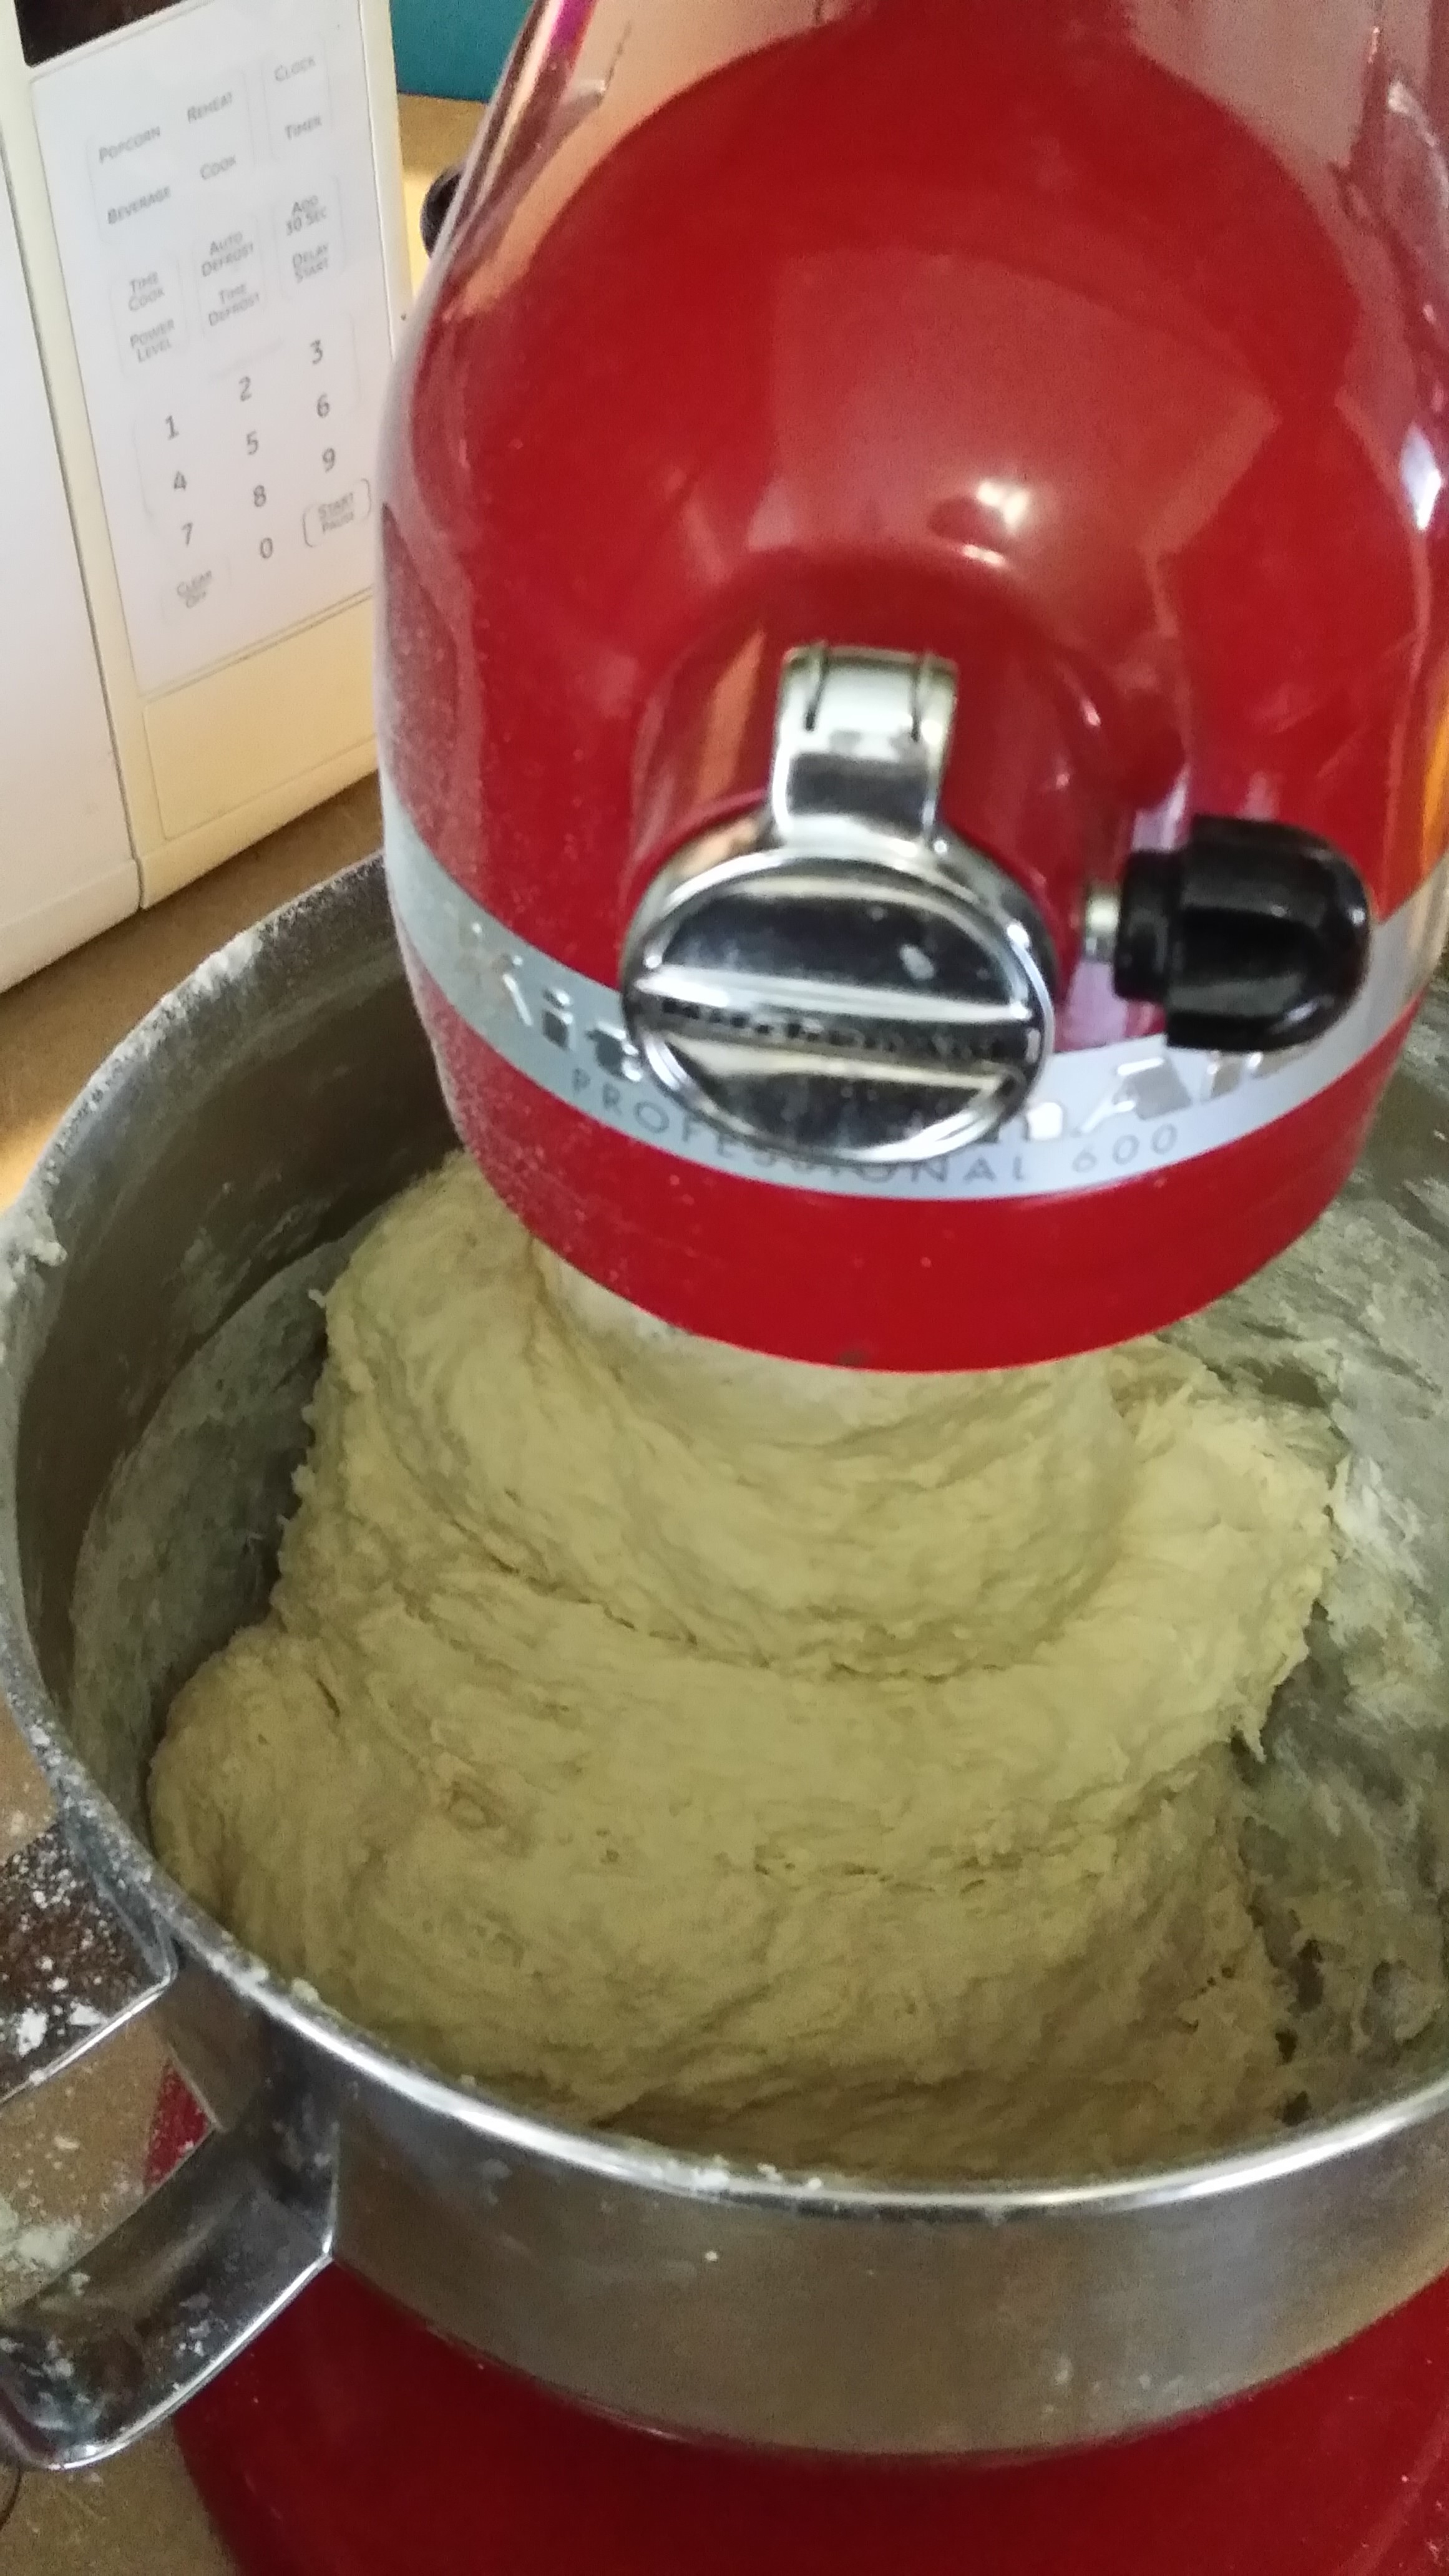 When making dough continue adding flour until it just starts to form a ball, slow down on the amount of flour you add at a time, only adding 1 or 2 tablespoons at a time and fully kneading it in before you add more. When the texture of your dough is uniform, slightly tacky but not sticky, and the bread still feels light and soft, then you have added enough flour. NOTE: if you are using a kitchenaid mixer as I do the dough will clean off the sides of the metal bowl leaving it clean, and the dough will no longer stick to the bottom of the bowl when you have enough flour.
If you take notes you will find that the amount of flour you use changes, even though your results will not.
NOTE: Some flours are stickier than others, as are some ingredients. If you are using oatmeal, or rye flour for instance, these doughs will always be sticky, use care to make sure you do not add too much flour in these. The same is true for many sweet doughs or those with a lot of eggs.
Checking to See if Your Dough is Kneaded Enough
This is one of the biggest problems faced by beginners, is not knowing when bread dough is ready after kneading. The purpose of kneading is to develop the gluten in the flour and give the dough elasticity it needs for rising properly.
Most recipes say knead until elastic and smooth, but this is really not enough information.
The best test is to take a walnut size piece of dough and stretch it until is thin and transparent like a balloon or wad of bubble gum. If the dough tears quickly or easily and you are unable to stretch it that thin, then your dough needs more kneading. This membrane like structure is called a gluten window in the baking world.
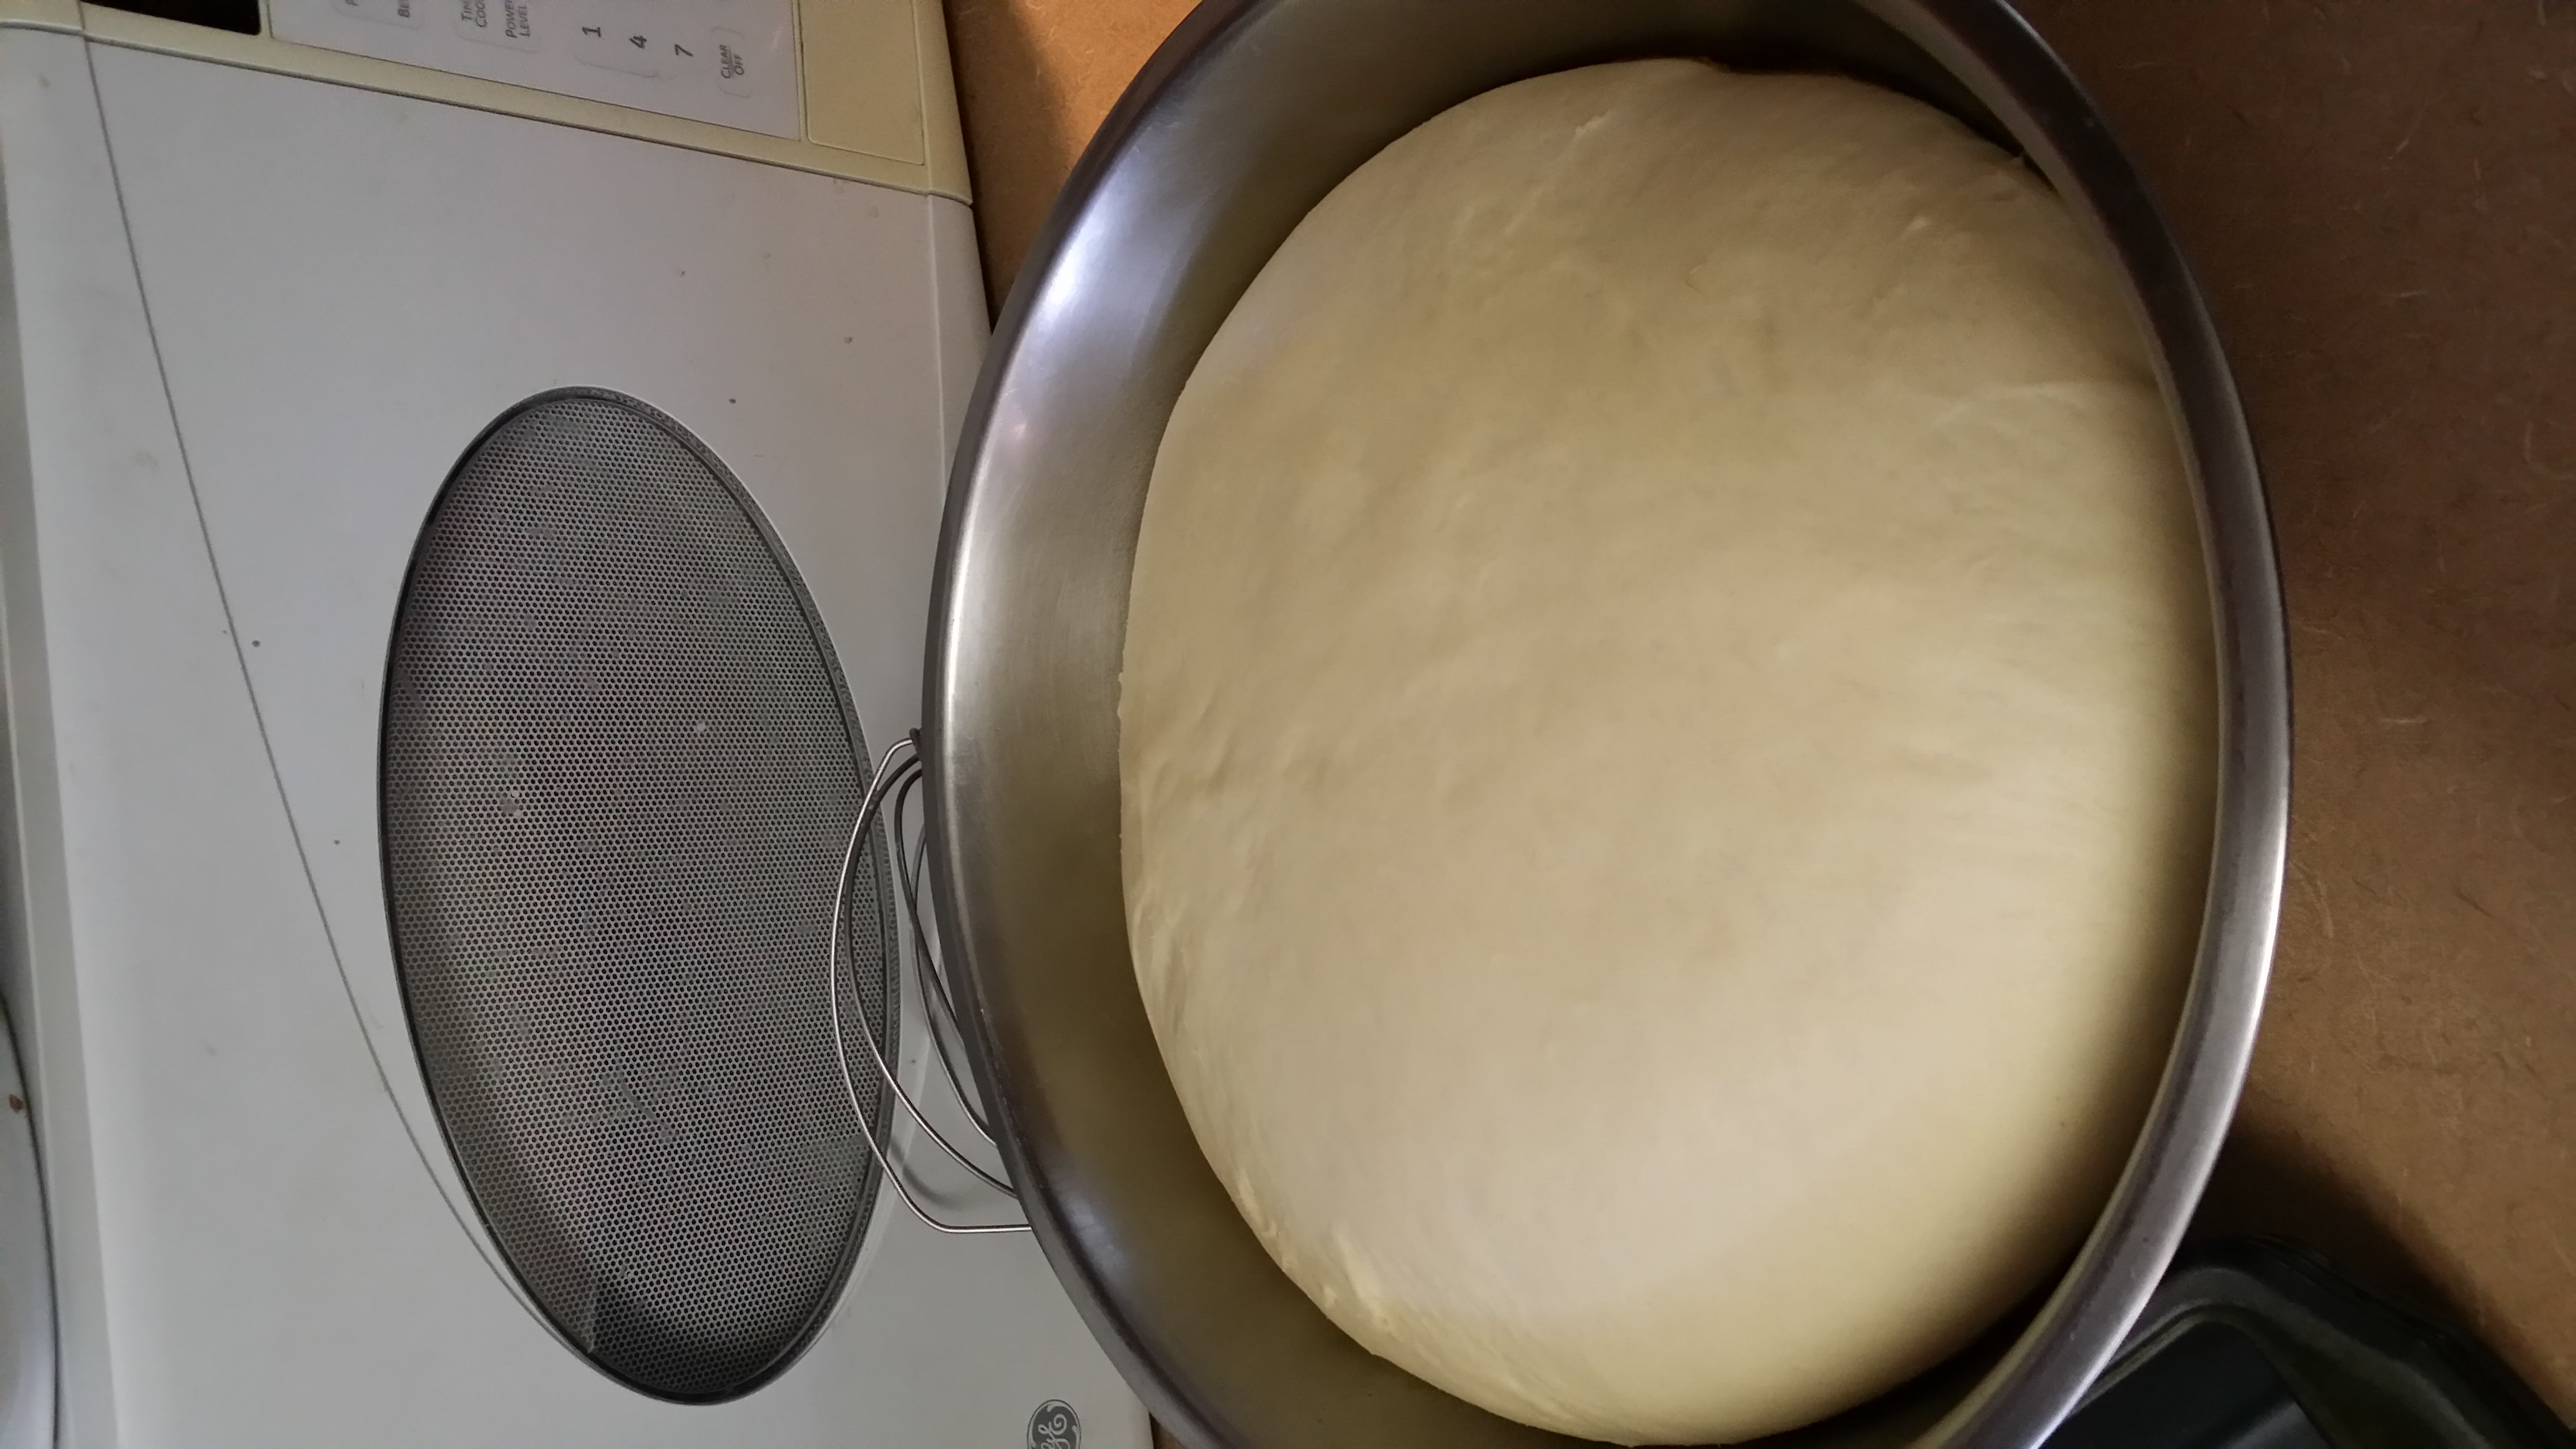
Letting it Rise
Letting dough rise is also critical to your success. Most recipes give you a certain time or say until double, but again there is a more accurate test.
Room temperature, humidity, the ingredients you use and how much you use, and the condition of the dough, all affect the time it takes your dough to rise. If you use cold ingredients (should be room temp) that can also make the yeast sluggish.
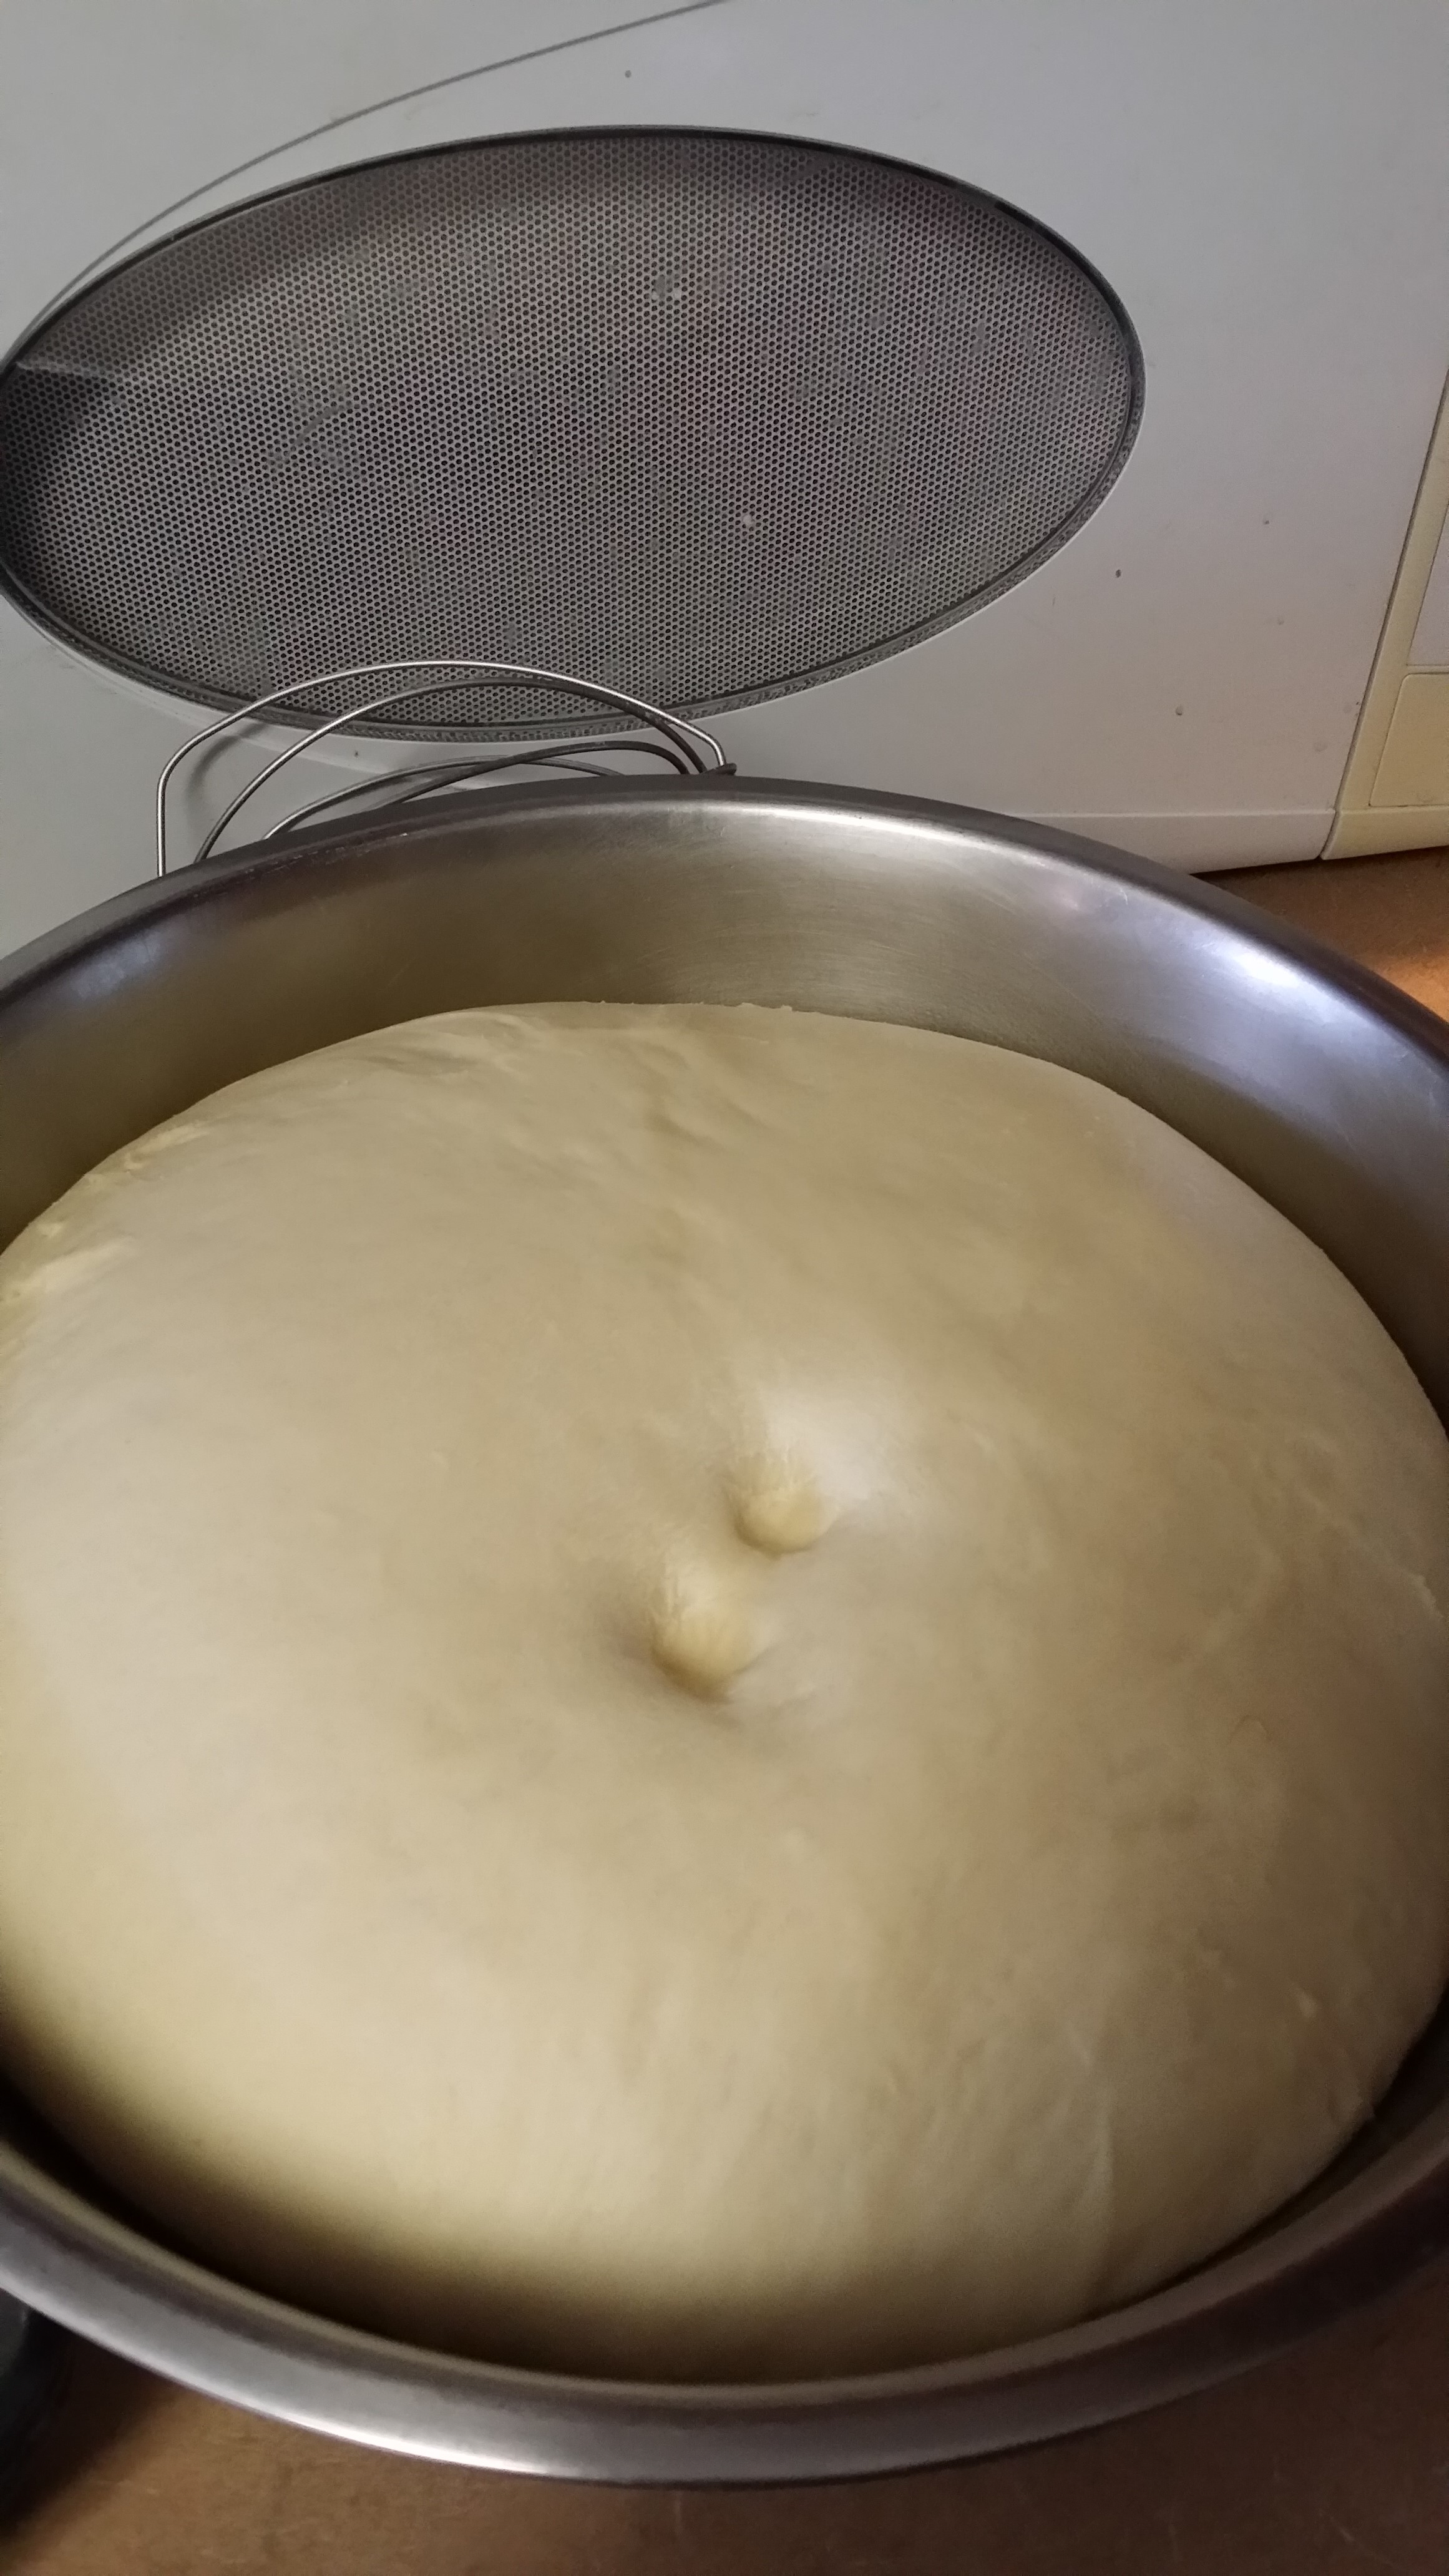 To check if dough is ready push two fingers into the dough about one inch. If the indents remain your dough is ready, if they disappear leave the dough for a while longer.
Once the dough is in the pan, you may not want to do this, simply wait until the dough has risen to the top or above the top of the pan, then it is time to put it in the oven.
Bake It Until It is Done
When is bread done? Slide it out of the pan and look at the bottom, if it is a nice gold brown and gives off a hollow thump when you tap on it, it is ready to go!
One last thing, Take your bread out of the pan and put it on a wire rack to cool right away. If you leave it in the pan, it will sweat and get soggy!
I’ve recently started baking bread. My first attempts weren’t very good, but now I getting better results. The key has been to keep trying. Thank you so much for the tips. Some I use, and some are new to me. My biggest problem is that most recipes are set up for two loaves, and we can only use one during a week’s period of time. I am sure some of my problems have occurred from trying to cut them in half. Do you have any suggestions for that? – Margy
Hi Margy try freezing half of the dough. You should let it go through its first rise, and then shape it into a loaf and freeze it. Some bakers suggest doubling the yeast, but I have never felt the need to do so. However if you have trouble getting it to rise after freezing you might try that.
Thanks for the response. I may try that, but I only have a very small freezer in my off the grid propane fridge. – Margy
I make at least 4 to 6 loaves at a time , I wait till they cool down to just above room temperature , then put them in 4 x 8 x 20 Bags bought at food wholesalers by the box ( 500 ) . Put the bread in the freezer , when you nedd one it’s stays fresh , If you need you can cut the loaves in half and do the same.
Good -Luck and Happy baking
Oh my word! Your directions and hints are wonderful! After reading your post I feel I have the confidence to get baking! Too many blogs I’ve visited tended to “talk over my head” and leave me with more questions than when I started. Thank you so much!
I’m also a beginner bread maker. I find that homemade bread gives me a lot of gas and stomach problems. I made a load today that had a rise time for about three hours altogether although I don’t think I kneaded the dough enough, and the bread came out nice but gave me a stomach ache. I seem to be able to handle a homemade loaf if I put the dough in the fridge for an overnight rise with no kneading necessary. Why is this? I am completely boggled!
Develop you own. Yeast starter and avoid commercially produced yeast. They are garbage and design to produce a huge volume of gas for a quick rise. A sourdough does not need to be sour. Fermented breads are healthier and more filling. Use organic flours mixed with whole meals and rye etc. keep trying, bread making takes practice.
iI have several recipes from Australia and I was wondering what changes I would have to make for altitude I live in Canada in the BC Rocky Mountians. This is a big difference altitude . I would appreciate any help you can give me. Thx for all the advise Carol
Well, for baking you really don’t have to change the recipe much unless you’re living more than 3,500 feet above sea level. At those altitudes, you’ll have to probably change the recipe a bit by baking for longer and adding some additional water or flour to get the right consistency, depending on altitude. Your dough may also raise a bit faster. This article has some great information on all of that. Hope it helps!
Thanks for the helpful suggestions. I have a few great recipes that are loved by our family but I’m trying to make multigrain bread with flax added. What changes should I expect with this dough?
This is the most considerate and well-thought instructions for beginners to bake bread for the first time!
must #repost and #share this article! Thank you so much, I look forward to baking this weekend!
Great info and feedback
Thank you for sharing
Why is bread doughy
Christine
hello good morning
plz the challenge I have in bread making It get bunt and the surface of my bread don’t usually look like a bread but like a meat pie
Hi Becky! If the surface of your bread is burnt but the inside is not cooking, then you’ll likely need to lower your baking temperature. Without knowing more specifics, it’s hard to say what exactly is going on otherwise. What are you baking?
I like baking.but this few days i stop baking anything.bcoz i couldn’t make my bun still the same texture and soft as the day i baked it. I always bake bread/bun in the afternoon/evening,for
breakfast the next day. Do you have tips to make the bread still soft and fluffy the next day??
Thanks.
Hi! Thanks for reading and commenting!! Some hardening of bread is natural, but if you put it in the refrigerator, it will naturally soften some from the moisture. I have also heard making linen bags to store bread in will help it stay fresh longer as well, although I personally don’t own any. Make sure it’s real linen, though, as cotton and other fabrics won’t have the same effect. Hope that helps!
I would like to share a tip for getting bread out of a bread mold… I find that if I try to rush the process of taking out the bread, My bread sometimes sticks, the loaves tear… SO, what I do is as soon as I take the bread out, I flip it over. If the bread is sticking out past the edge of the pan, I try to balance it on something so that theres just a tiny bit of space between the bread and the countertop. In about 10 to 15 minutes I hear the familiar plop of bread hitting the counter. Then I just turn it back over and place it on a cooling rack.
What a great tip! Thanks for sharing, Christina!!